I'd been thinking about collage art for a quite a while, especially after returning from Paris last summer. Paris in all its glory opened my eyes to art beyond fabric or paint, and particuarly that which incorporates photography. For a gal who didn't study art in collage (I have BSs in Public Health and Chemistry), I felt like a child in a candy store visiting countless Paris museums, day dreaming about colors and hopeful to one day create an inspirational piece about my 2012 France trip. Those day dreams have finally come to fruition through the simple medium of collage, an art technique that suits me just dandy. Collage feels quite natural and personal to me, as if I'm free style rapping or writing a poem. The biggest revelation from being collage active is that it expresses all of my artistic interests in one placd. And, if I am to be an artist, then I must create unique impressions from my heart.
With my new undying affection for collage, join me this month at my shop where I hope to collage among friends and build community at the same time. I'm envisioning nights of paint, photo, glitter, paper, scissors, good snacks, laughs and more. Make sure to bring your beverage of choice.
Hope to see you soon!
m.
PS. The fabric collage I made below is called Zion ;)
Be the first to sign-up for sewing classes this January and February! We are offering our most popular courses: Beginning Sewing and Beginning Dress Construction with locations in Brooklyn and Manhattan.
Take part in learning the art of sewing and developing your creativity. Check out one of our students and what her experience was like learning to sew: "November's Sewing Talk with Erin Hefner"
Fall has arrived and we've opened up registration for October sewing classes!
Part of the exciting fall line-up is our new sewing studio in Manhattan. So get ready city-dwellers, we'll be hosting classes out of our city-space right next to Bryant Park! Check out Beginning Sewing and Beginning Dress Construction available on Monday and Wednesday nights.
Also stay tuned for our quilting and knitting courses coming up in November!
For more information regarding classes or registration click here, or email katie@sewmoni.com.
Apron Panel Width
1) Measure the width of your hips. If you're wearing pants or a skirt you can use the side seams of the garment as a guide
2) Add 5 inches to this measurement to account for tucks and seam allowance. This measurement will become the width of the apron panel.
3) Divide this number in half to use for drafting the apron panel. We will call this half-width.
Apron Panel Length
1) Decide on the length of the apron panel. Measure from the waist down to the desired length.
2) Add 1 inch to account for seam allowance.
Apron Tie
1) Measure around your waist.
2) Add 32 inches to this length to account for a bow
Cutting the Apron Panels and Apron Tie
Drafting the Apron Panel Pattern onto the Lining Fabric:
1) Fold fabric in half a little more than the half-width of the apron panel.
2) Using the tape measure and pin, measure down the fold of the fabric to the apron panel length and make a small mark.
3) At this mark, measure across the width of the fabric, making a mark at the half-width.
4) Connect the two points together with a straight line.
5) From the end of this line draw a perpendicular line measuring the apron panel length.
6) The measurements and lines will form a rectangular shape.
7) To make the curved edge, use a cup or plate as a guide to draw the curve.
Cutting the Apron Panel from the Lining Fabric:
1) Cut out apron Panel along the guide lines that you have drawn.
Cutting the Apron Panel from Face Fabric
1) Fold face fabric to appropriate width.
2) Pin previously cut lining fabric on top, lining up the folded edges.
3) Cut out.
Cutting the Apron Tie
1) Cut apron tie 5 inches wide, using the calculated length.
**If your fabric is not long enough to accommodate the tie length, simply cut enough piece to add up to the calculated length. Sew these pieces together to create one tie.**
After the previous steps, you should have cut 1 apron panel from the face fabric, 1 apron panel from the lining fabric, and 1 apron tie.
Sewing the Apron Panel
Joining Apron Panels:
1) Place apron panels on top of each other, right sides together.
2) Pin in place.
3) Starting in the right hand corner, sew down and around the curved edges. End in the left hand corner, leaving the top straight edge of the piece un-sewn.
Notching Apron Panel:
1) Notch apron panel curves by cutting triangles into the seam allowance. This will make it easier when turning the piece right side out.
**Be careful not to cut into the sewn seam**
Turning Apron Panel:
1) Turn apron right side out.
2) Push the corners out so that they lay flat and smooth.
3) Iron entire panel flat.
Top Stitch Apron Panel:
1) Top stitch around all edges of the apron panel 1/8 inch from the edge.
** Top stitch the opening as well in preparation for the tucks**
Adding Tucks to the Apron Panel
Measuring Tuck Placement:
1) Measure 3 inches in frorm the side and place a pin.
2) From that mark measure 1 1/2 inches in and place a pin.
3) Continue this process until you have 3 to 4 pins in place. These pins will determine the placement of the tucks.
4) Repeat these steps on the other side of the apron.
Forming the Tucks:
1) Taking one at a time, fold the apron panel in half (face fabric together) where the pin in placed.
2) Pin this fold together
3) Sew next to this fold 1/4 inch from the fold. Sew 1 1/2 inches down and backstitch.
4) Repeat these steps until all pin markers have been formed into tucks.
Ironing the Tucks:
1) Iron all tucks in one direction so that the folded edges of the tucks face inward.
Sewing the Apron Tie
Ironing the Apron Tie:
1) Iron the raw edges of the apron tie in 1/2 inch.
2) Iron the ends of the apron tie in 1/2 inch.
3) Fold apron tie in half, matching up the folded edges and iron flat.
Attaching Apron Tie to Apron Panel:
1) Lay out the apron tie and open it so that the pressed in seam allowance in exsposed.
2) Line up the raw edge of the apron panel with the raw edge of the apron tie seam allowance.
3) Fold the apron tie back over so that the fold lines meet up.
4) Pin in place.
Top Stitch Apron Tie:
1) Now that everything is pinned together, top stitch the entire apron tie.
2) Start on the apron tie side where the folded edges meet. Sew 1/8 inch from the edge.
Finishing Touches:
1) Iron one last time and then bake some cookies!!!
Measurements are not only the foundation for choosing patterns and correct sizing, but they are also the foundation for pattern making and should be taken accurately to insure a good fit.
Measurement Preparation:
- When taking measurements, measure over a lightweight dress or slip wearing the same undergarments you will be wearing with the piece you're making.
- Tie a string or ribbon around your waist for a reference point as well.
Measuring Tips:
- When measuring lengths, make sure the measuring tape is perpendicular to the floor
- When measuring widths around your body, make sure the measuring tape is parallel to the floor
- When measuring around your body, make sure the tape is comfortably close to body, but not tight. This will insure an accurate measurement.
Important measurements:
- Bust: Measure around the fullest part (holding measuring tape firmly but not tightly)
- Waist: Measure around smallest art of your waist (where the string is tied)
- Center front bodice length: Measure the center front from the base of the neck to the waistline
- Center back bodice length: Measure the center back from the base of the neck to the waistline
- Hips: Measure around the fullest part of your hips (including your bottom)
- Thighs: Measure around the fullest part of your thighs
- Skirt Length: Measure from waistline (or where waistband will be) to correct length. Measure at center front, center back, right side and left side
Take these measurements down in notebook that you can keep on hand when you go shopping for patterns or when you are drafting your own. It saves time and will help you get a great fit!
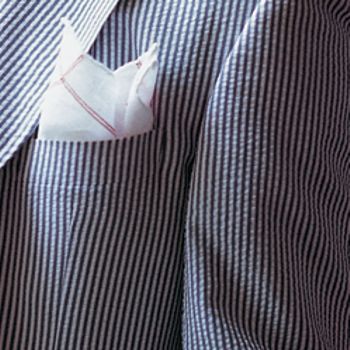
With this wonderful heat wave that has swept through New York this past week, my mind couldn't help but wonder to the cooler fabrics of summer. One of my personal favorites is seesucker.
Usually made of 100% cotton, this woven sports a rippled or wrinkled appearance making it great for relaxed summer wear. The fabric ripples are created in the weaving process, called slack-tension weave. The use of tightly woven, heavy-weight warp yarns and loosely woven light-weight weft and warp yarns created the unique texture of seersucker.
The weaving pattern creates a stripped or plaid design in the fabric. The name seersucker originates from the Persian words for milk and sugar (shir or shekar) in reference to the smooth and bumpy texture. The rippled texture actually keeps the fabric from clinging to the skin and allows air flow between the skin and fabric to keep you nice and cool. Also, since it's already wrinkled, there is no need to iron before wearing, just get up and go. Seersucker is featured in children's clothing, suiting, shirts, skirts, pants, and shorts.
So go with the summer time flow and whip up a couple of dresses or skirts to keep you cool this season!
3 rulers - 3 brands - 3 uses
______________________________ Each ruler has a specific use and works quite well in the mediums they've been designed for. So amp up your crafting with one of these nifty rulers and let the creativity begin!
Great for:
-Taking general measurements and gauging seam allowances
-Measuring and marking placement for buttons, buttonholes
-Measuring and marking spacing for pleats and tucks -Drawing pattern guidelines-Makes a useful as a guide for rotary cutters
Specifications:
-15 inches long, 4 inches wide
-1/8 inch thick (its heavier weight makes it great for a cutting guide)
-Inches are marked along one side, Centimeters are marked along the other side
-Pre-measured slots run length of ruler to make quick and accurate markings
Great for:
-Taking general measurements and gauging seam allowances
-Makes a useful as a guide for rotary cutters
-Marking and cutting quilting pieces
Specifications:
-18 inches long, 3 inches wide
-1/8 inch thick (its heavier weight makes it great for a cutting guide, but not too bulky to move around your cutting table easily)
-Marked with 1 inch grid lines and 1/4 inch lines run the length of the ruler (great for measuring quilting pieces)
**I love to use this one for all my rotary cutting needs**
SEWMoni's sewing classes got me thinking about when I first began sewing as a little girl in Hawaii. An elderly Japanese woman taught lessons out of her home. Frail and petite in stature, she somehow managed to maintain strict obedience in our small room full of young students without ever raising her voice. She was graceful and precise with her long skeletal fingers, working with incredible speed with the needle and thread. My sewing sensei taught me precision in my needle-work, but never allowed our class to venture creatively.
At SEWmoni the students learn the basics of sewing and begin to form their own projects. Teachers at SEWmoni help the students cultivate what they aspire to construct. Many of the current students have only recently explored sewing as a hobby and have already developed business ideas around the craft! Get inspired!
Want to register for class? Take a look at our Class Schedule!
Below is an excerpt from 150 Sewing Tips by Mary Johnson, printed in Woman's Day in 1962. I found this booklet in my grandmother's sewing library. Reading it not only conjured up memories of my grandmother, but reminded me of the legacy of this crafting tradition.
The Importance of Pressing
* Good pressing is done slowly with a gliding motion. Don't bear down heavily when pressing seams open or darts flat or you'll get a ridge on the right side. Too much pressure also produces a shine on dark fabrics, flattens napped fabrics, and stretches loosely woven ones.
* Press seams open unless the pattern specifies otherwise. Start at bottom of a seam and work toward top.
* Press vertical darts toward center, underarm and elbow darts with fold down. When working with a heavy fabric, stitch darts, then slash to within about 1/2" of each point and press open.
* You must press as you go, but you don't need to jump up and press each seam the minute it's sewn. Join the parts that make up a unit, make any darts in it, then put it aside and work on another. When all units are prepared, press them before joining them.
* To prevent the topline of the hem from being embossed on the right side, press thoroughly only on the lower half. The upper half is given a once-over-lightly touch-up with a dry iron.
* Never press the bottoms of hems into creases before you hem them.
Organza is traditionally made of 100% silk, but is also created with synthetic filament yarns like polyester, nylon, acetate, and viscose. These filament fibers also give organza a slight resilience and resistance to being bent or folded making it perfect for billowy or structural garment/upholstery designs. Because of its looser weave, the fabric is light weight and has a transparent appearance. You can find them in any color, some with metallic threads, some embroidered, or some embossed.
Organza is created in the mills of China, India, France, Italy and the United States. Each mill boasts a specific type of organza. Chinese organza is mostly created with 100% silk. Indian and American organzas generally use synthetic fibers like polyester and nylon. However, organza from France and Italy is a bit more sturdy with a blend of nylon and silk yarns.
Silk organza is commonly used in bridal wear and evening wear. Whereas synthetic organzas are used for everyday interior purposes like curtains and accent pillows. Synthetic organza, especially the embroidered, embossed, or metallic designs, has even made its way onto table settings as a layering cloth to bring drama, color, and life to receptions and dinner parties.
Speaking of dinner parties, I remember my grandmother wearing an organza pin-apron while preparing for a summer seafood dinner. It was so beautiful and the use of organza made a common/functional item into something beautiful, beyond the confines of everyday duties like cooking and cleaning. She got quite a few compliments that night if I can remember correctly.
So don't be afraid to try new fabrics, it will not only challenge you as a sewer, but will also challenge your creativity and increase your inspiration as you work with a new medium.
Happy Sewing!
-Katie
July 4th has brought out the best in me.
It's made me realize that I often need a 4 day weekend
It's given me time to catch up on old movie classics that simply make me giggle, more than white wine
It's provided extra time to try new foods, such as risotto
It's reminded me that one can never have enough damask inspired fabric
Below is an excerpt from 150 Sewing Tips by Mary Johnson, printed in Woman's Day in 1962. I found this booklet in my grandmother's sewing library. Reading it not only conjured up memories of my grandmother, but reminded me of the legacy of this crafting tradition.
Facts about Fabrics
* Woolens are the easiest to handle, especially the firmly woven medium weights. They come folded wrong-side out, all ready or the pattern.
* Cottons are the next easiest. They are folded right-side out and when printed, or when the right and wrong sides are different, as in sateen, they must be re-folded wrong-side out, before pinning pattern.
* Tubular jersey and other knits are often manufactured with the right-side out, but sometimes come the other way around, so inspect them carefully before laying out the pattern.
* Some wools have nap, a surface finish on the right side that is smooth to the touch when brushed with the hand one way, rough when brushed the other. Use with nap smooth in a downward direction.
* Some cottons such as corduroy have a pile, smooth to the touch one way, rough the other. The smoothness is usually worn upward for clothing, directed down for household items.
* Synthetics, made in many imitations of natural fabrics, often have a nap or pile too, and they are used in exactly the same way as their natural counterparts are.
* When silk, rayon or synthetic velvet is used for clothing, the pile is usually worn upward for richer color and better wearing quality.
* With upholstery velvets, the pile is placed downward. The tone is subtler and it is easier to clean.
* Some fabrics must be held taut during stitching, with one hand ahead of the needle, the other behind it. This applies to heavy coatings on which the presser foot tends to move the top layer and cause uneven ends at the bottom of the seam; to plaids so that the lines stay matched; to synthetics and to sheers like organza, no matter what their fiber content, to prevent puckering.
Have more questions about fabric? Stay tuned for Textile Tuesdays where we highlight a different fabric's make and use every week.
I found some old sewing notes my grandmother made as she was learning machine embroidery on her Singer. The complexity of these stitch patterns are amazing! Since her day, the cost to buy embroidered fabric is much lower and as a result the art of enhancing fabric with machine or hand embroidery has somewhat been lost. So take a sewing lesson from my grandmother, Norma Joy, on the Spark Stitch.
Spark Stitch
Supply List: -Fine silk or mercerized thread -Heavy silk or mercerized thread -Embroidery hoop -Sewing machine -Feed plate cover, or machine with feed adjustment
Threading Prep: The Spark Stitch is done with fine silk, or fine mercerized thread on the bobbin and heavy silk or heavy-duty mercerized thread on top.
Machine Prep: The bobbin, or lower tension is loose. The upper tension is normal or slightly tight. The feed of the sewing machine is dropped or a feed cover late is used. Remove the presser foot.
Fabric Prep: The design is stamped or drawn on the right side of the fabric. Place material in hoops. If following a a pattern is preferred select one recommended for braiding
Beginning Stitch: Insert hoops under needle and presser bar. Lower presser bar. Hold end of top thread, lower needle, and draw bobbin thread through to top
Spark Stitch: The work is guided about in an even circular motion while following the design. This is usually freehand work and is done on the right side of the garment.
I feel quite inspired to try this myself on some dish towels, or maybe some old denim cut-offs. It could be quite cute right?