Be the first to sign-up for sewing classes this January and February! We are offering our most popular courses: Beginning Sewing and Beginning Dress Construction with locations in Brooklyn and Manhattan.
Take part in learning the art of sewing and developing your creativity. Check out one of our students and what her experience was like learning to sew: "November's Sewing Talk with Erin Hefner"
Fall has arrived and we've opened up registration for October sewing classes!
Part of the exciting fall line-up is our new sewing studio in Manhattan. So get ready city-dwellers, we'll be hosting classes out of our city-space right next to Bryant Park! Check out Beginning Sewing and Beginning Dress Construction available on Monday and Wednesday nights.
Also stay tuned for our quilting and knitting courses coming up in November!
For more information regarding classes or registration click here, or email katie@sewmoni.com.
Apron Panel Width
1) Measure the width of your hips. If you're wearing pants or a skirt you can use the side seams of the garment as a guide
2) Add 5 inches to this measurement to account for tucks and seam allowance. This measurement will become the width of the apron panel.
3) Divide this number in half to use for drafting the apron panel. We will call this half-width.
Apron Panel Length
1) Decide on the length of the apron panel. Measure from the waist down to the desired length.
2) Add 1 inch to account for seam allowance.
Apron Tie
1) Measure around your waist.
2) Add 32 inches to this length to account for a bow
Cutting the Apron Panels and Apron Tie
Drafting the Apron Panel Pattern onto the Lining Fabric:
1) Fold fabric in half a little more than the half-width of the apron panel.
2) Using the tape measure and pin, measure down the fold of the fabric to the apron panel length and make a small mark.
3) At this mark, measure across the width of the fabric, making a mark at the half-width.
4) Connect the two points together with a straight line.
5) From the end of this line draw a perpendicular line measuring the apron panel length.
6) The measurements and lines will form a rectangular shape.
7) To make the curved edge, use a cup or plate as a guide to draw the curve.
Cutting the Apron Panel from the Lining Fabric:
1) Cut out apron Panel along the guide lines that you have drawn.
Cutting the Apron Panel from Face Fabric
1) Fold face fabric to appropriate width.
2) Pin previously cut lining fabric on top, lining up the folded edges.
3) Cut out.
Cutting the Apron Tie
1) Cut apron tie 5 inches wide, using the calculated length.
**If your fabric is not long enough to accommodate the tie length, simply cut enough piece to add up to the calculated length. Sew these pieces together to create one tie.**
After the previous steps, you should have cut 1 apron panel from the face fabric, 1 apron panel from the lining fabric, and 1 apron tie.
Sewing the Apron Panel
Joining Apron Panels:
1) Place apron panels on top of each other, right sides together.
2) Pin in place.
3) Starting in the right hand corner, sew down and around the curved edges. End in the left hand corner, leaving the top straight edge of the piece un-sewn.
Notching Apron Panel:
1) Notch apron panel curves by cutting triangles into the seam allowance. This will make it easier when turning the piece right side out.
**Be careful not to cut into the sewn seam**
Turning Apron Panel:
1) Turn apron right side out.
2) Push the corners out so that they lay flat and smooth.
3) Iron entire panel flat.
Top Stitch Apron Panel:
1) Top stitch around all edges of the apron panel 1/8 inch from the edge.
** Top stitch the opening as well in preparation for the tucks**
Adding Tucks to the Apron Panel
Measuring Tuck Placement:
1) Measure 3 inches in frorm the side and place a pin.
2) From that mark measure 1 1/2 inches in and place a pin.
3) Continue this process until you have 3 to 4 pins in place. These pins will determine the placement of the tucks.
4) Repeat these steps on the other side of the apron.
Forming the Tucks:
1) Taking one at a time, fold the apron panel in half (face fabric together) where the pin in placed.
2) Pin this fold together
3) Sew next to this fold 1/4 inch from the fold. Sew 1 1/2 inches down and backstitch.
4) Repeat these steps until all pin markers have been formed into tucks.
Ironing the Tucks:
1) Iron all tucks in one direction so that the folded edges of the tucks face inward.
Sewing the Apron Tie
Ironing the Apron Tie:
1) Iron the raw edges of the apron tie in 1/2 inch.
2) Iron the ends of the apron tie in 1/2 inch.
3) Fold apron tie in half, matching up the folded edges and iron flat.
Attaching Apron Tie to Apron Panel:
1) Lay out the apron tie and open it so that the pressed in seam allowance in exsposed.
2) Line up the raw edge of the apron panel with the raw edge of the apron tie seam allowance.
3) Fold the apron tie back over so that the fold lines meet up.
4) Pin in place.
Top Stitch Apron Tie:
1) Now that everything is pinned together, top stitch the entire apron tie.
2) Start on the apron tie side where the folded edges meet. Sew 1/8 inch from the edge.
Finishing Touches:
1) Iron one last time and then bake some cookies!!!
Measurements are not only the foundation for choosing patterns and correct sizing, but they are also the foundation for pattern making and should be taken accurately to insure a good fit.
Measurement Preparation:
- When taking measurements, measure over a lightweight dress or slip wearing the same undergarments you will be wearing with the piece you're making.
- Tie a string or ribbon around your waist for a reference point as well.
Measuring Tips:
- When measuring lengths, make sure the measuring tape is perpendicular to the floor
- When measuring widths around your body, make sure the measuring tape is parallel to the floor
- When measuring around your body, make sure the tape is comfortably close to body, but not tight. This will insure an accurate measurement.
Important measurements:
- Bust: Measure around the fullest part (holding measuring tape firmly but not tightly)
- Waist: Measure around smallest art of your waist (where the string is tied)
- Center front bodice length: Measure the center front from the base of the neck to the waistline
- Center back bodice length: Measure the center back from the base of the neck to the waistline
- Hips: Measure around the fullest part of your hips (including your bottom)
- Thighs: Measure around the fullest part of your thighs
- Skirt Length: Measure from waistline (or where waistband will be) to correct length. Measure at center front, center back, right side and left side
Take these measurements down in notebook that you can keep on hand when you go shopping for patterns or when you are drafting your own. It saves time and will help you get a great fit!
With this wonderful heat wave that has swept through New York this past week, my mind couldn't help but wonder to the cooler fabrics of summer. One of my personal favorites is seesucker.
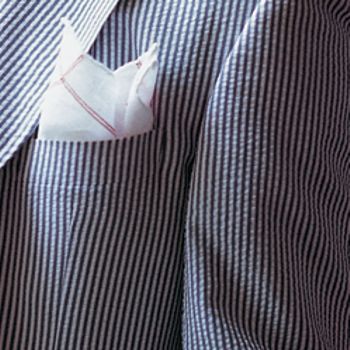
Usually made of 100% cotton, this woven sports a rippled or wrinkled appearance making it great for relaxed summer wear. The fabric ripples are created in the weaving process, called slack-tension weave. The use of tightly woven, heavy-weight warp yarns and loosely woven light-weight weft and warp yarns created the unique texture of seersucker.
The weaving pattern creates a stripped or plaid design in the fabric. The name seersucker originates from the Persian words for milk and sugar (shir or shekar) in reference to the smooth and bumpy texture. The rippled texture actually keeps the fabric from clinging to the skin and allows air flow between the skin and fabric to keep you nice and cool. Also, since it's already wrinkled, there is no need to iron before wearing, just get up and go. Seersucker is featured in children's clothing, suiting, shirts, skirts, pants, and shorts.
So go with the summer time flow and whip up a couple of dresses or skirts to keep you cool this season!
3 rulers - 3 brands - 3 uses
______________________________ Each ruler has a specific use and works quite well in the mediums they've been designed for. So amp up your crafting with one of these nifty rulers and let the creativity begin!
Great for:
-Taking general measurements and gauging seam allowances
-Measuring and marking placement for buttons, buttonholes
-Measuring and marking spacing for pleats and tucks -Drawing pattern guidelines-Makes a useful as a guide for rotary cutters
Specifications:
-15 inches long, 4 inches wide
-1/8 inch thick (its heavier weight makes it great for a cutting guide)
-Inches are marked along one side, Centimeters are marked along the other side
-Pre-measured slots run length of ruler to make quick and accurate markings
Great for:
-Taking general measurements and gauging seam allowances
-Makes a useful as a guide for rotary cutters
-Marking and cutting quilting pieces
Specifications:
-18 inches long, 3 inches wide
-1/8 inch thick (its heavier weight makes it great for a cutting guide, but not too bulky to move around your cutting table easily)
-Marked with 1 inch grid lines and 1/4 inch lines run the length of the ruler (great for measuring quilting pieces)
**I love to use this one for all my rotary cutting needs**
SEWMoni's sewing classes got me thinking about when I first began sewing as a little girl in Hawaii. An elderly Japanese woman taught lessons out of her home. Frail and petite in stature, she somehow managed to maintain strict obedience in our small room full of young students without ever raising her voice. She was graceful and precise with her long skeletal fingers, working with incredible speed with the needle and thread. My sewing sensei taught me precision in my needle-work, but never allowed our class to venture creatively.
At SEWmoni the students learn the basics of sewing and begin to form their own projects. Teachers at SEWmoni help the students cultivate what they aspire to construct. Many of the current students have only recently explored sewing as a hobby and have already developed business ideas around the craft! Get inspired!
Want to register for class? Take a look at our Class Schedule!
Below is an excerpt from 150 Sewing Tips by Mary Johnson, printed in Woman's Day in 1962. I found this booklet in my grandmother's sewing library. Reading it not only conjured up memories of my grandmother, but reminded me of the legacy of this crafting tradition.
The Importance of Pressing
* Good pressing is done slowly with a gliding motion. Don't bear down heavily when pressing seams open or darts flat or you'll get a ridge on the right side. Too much pressure also produces a shine on dark fabrics, flattens napped fabrics, and stretches loosely woven ones.
* Press seams open unless the pattern specifies otherwise. Start at bottom of a seam and work toward top.
* Press vertical darts toward center, underarm and elbow darts with fold down. When working with a heavy fabric, stitch darts, then slash to within about 1/2" of each point and press open.
* You must press as you go, but you don't need to jump up and press each seam the minute it's sewn. Join the parts that make up a unit, make any darts in it, then put it aside and work on another. When all units are prepared, press them before joining them.
* To prevent the topline of the hem from being embossed on the right side, press thoroughly only on the lower half. The upper half is given a once-over-lightly touch-up with a dry iron.
* Never press the bottoms of hems into creases before you hem them.
WARNING!! It is HOT HOT HOT outside in Brooklyn today.
I just came back from running with Katie (SEW Moni Designer) and Taru (SEW Moni Sewing Instructor) and I can't express how HOT we were, even while doing push ups in the shade. I secretly prayed for rain the whole time.
After sweating and doing one to many sumo wrestler lunges, I was left craving Pinche Tacos (in Ft. Greene) and an ice cold lemonade. The heat (and muscle burn) also reminded me of Mexico: fun, great food, margaritas, strapless dresses made from Mexican fabrics and dancing till dawn.
Above it just a taste of my day and maybe it will inspire you to A. Get a margarita or B. Head for the border.
Below is an excerpt from 150 Sewing Tips by Mary Johnson, printed in Woman's Day in 1962. I found this booklet in my grandmother's sewing library. Reading it not only conjured up memories of my grandmother, but reminded me of the legacy of this crafting tradition.
Facts about Fabrics
* Woolens are the easiest to handle, especially the firmly woven medium weights. They come folded wrong-side out, all ready or the pattern.
* Cottons are the next easiest. They are folded right-side out and when printed, or when the right and wrong sides are different, as in sateen, they must be re-folded wrong-side out, before pinning pattern.
* Tubular jersey and other knits are often manufactured with the right-side out, but sometimes come the other way around, so inspect them carefully before laying out the pattern.
* Some wools have nap, a surface finish on the right side that is smooth to the touch when brushed with the hand one way, rough when brushed the other. Use with nap smooth in a downward direction.
* Some cottons such as corduroy have a pile, smooth to the touch one way, rough the other. The smoothness is usually worn upward for clothing, directed down for household items.
* Synthetics, made in many imitations of natural fabrics, often have a nap or pile too, and they are used in exactly the same way as their natural counterparts are.
* When silk, rayon or synthetic velvet is used for clothing, the pile is usually worn upward for richer color and better wearing quality.
* With upholstery velvets, the pile is placed downward. The tone is subtler and it is easier to clean.
* Some fabrics must be held taut during stitching, with one hand ahead of the needle, the other behind it. This applies to heavy coatings on which the presser foot tends to move the top layer and cause uneven ends at the bottom of the seam; to plaids so that the lines stay matched; to synthetics and to sheers like organza, no matter what their fiber content, to prevent puckering.
Have more questions about fabric? Stay tuned for Textile Tuesdays where we highlight a different fabric's make and use every week.
Below is an excerpt from 150 Sewing Tips by Mary Johnson, printed in Woman's Day in 1962. I found this booklet in my grandmother's sewing library. Reading it not only conjured up memories of my grandmother, but reminded me of the legacy of this crafting tradition.
You Sewing Machine
* If the thread breaks when you stitch, the machine is improperly threaded, you've inserted the needle improperly or you are using the wrong make needle.
* If the machine has been unused for some time, oil it in the tiny holes provided for that purpose. Stitch through cotton strips to absorb excess oil.
* Regulate length of machine stitching to suite fabric texture. For heavy coatings, 12 to 13 stitches to the inch; for medium-weight suiting, cotton or synthetics, 14 or 15; for sheers, 16 or 18.
* Use a medium-size machine needle for general garment making.
* If the stitches don't look right, check threading and bobbin. If the trouble still exists, consult the instruction book.
* You can improvise a seam guide with a strip of adhesive tape about 2" long. Place it straight up and down on the machine plate as far right of needle hole as width of seam allowance (usually 5/8"). When you stitch, bring raw edges of fabric up against tape edge.
* If your machine puckers some fabrics take the needle out of the shaft and roll is on fine sandpaper; or sew through the sandpaper without thread (abrasive side up to sand won't get into the works).
* If machine skips stitches on synthetics, especially tricots, change to a fine machine needle and nylon thread.
Researching the origins of sewing circles in the USA, I found the beginnings alongside the birth of our country. Many started in churches, as those acted as the tight knit community centers of the day. One sewing circle at Ocean View Presbyterian Church in Delaware was formed in 1879 and served as a place of fellowship and education as well as a basis to fund mission work using handmade goods. This particular sewing circle still stands as the oldest operating society in Delaware.
Many sewing circles served similar purposes and even branched into politics. In an excerpt from Frederick Douglas and the Atlantic World, Douglas wrote a letter to the Lynn Anti-Slavery Sewing Circle in 1846 which shows an even greater social aspect a sewing circle can have.
During the 1950s and 1960s sewing circles took a turn toward the younger generation. Girls would gather in each others homes to hand-sew doll clothing and discuss fund-raising projects for church or school. Many served as a social club since completing projects took a back seat to gossip and eating snacks.
Today sewing circles are still found in churches branching now into community centers, home groups, and businesses that capitalize on sewing. I believe being part of a community is a beautiful thing and being able to share such a personal craft with one another in a group creates a place of endless possibilities. The sewing circle is not only a place to share useful information and inspiration about the craft but serves as a place to sharpen one's person and world views.
Why not start your own sewing circle. Start with a pattern, a social project, or even a simple minding party. Ask friends over once of twice a month to share in the fun and let it naturally evolve from there. Beginning and ending one project after another will establish a beautiful tradition in no time.
Looking to invest in your first sewing machine? Or maybe you've been wanting to upgrade your old machine?
From personal experience and working with students of all skill levels, we have gathered quite a bit of information and recommendations concerning the purchase of a new machine and have prepared a checklist to guide you in your search.
Begin at the Beginning
Some personal questions to consider:
*What will you be using your new machine for? Home projects, garment construction, quilting, etc.?
*How often will you be using this machine? Occasionally for clothing repairs, every day to manufacture your ouwn clothing line
*Do you need to transport/move the machine often?
These questions will help you determine what machine functions you need to look for when reviewing the product details of the machines
Tried and True Brands
These names have been around for ages and still continue to produce quality products in varying price ranges. Singer Brother Janome
Basic Machine Capabilities You Can't Live Without Must have...
*Varying stitch functions including
-Straight stitch with adjustable lengths
-Zigzag stitch with adjustable widths and lengths
-Blind Stitch for sewing trouser and skirt hems
*Free arm for sewing cuffs and sleeves
*Zipper foot for inserting zippers
*Buttonhole foot to guide you while sewing
Life is easier with...
*1-step buttonhole function (4-step buttonhole is okay, but a little more tricky to sew)
*Drop in bobbin
*Quick change presser feet or snap on presser feet
*Decorative or quilting stitches (fun, but not necessary)
Misconceptions
Price is not always an indicator of the machine's quality. Purchasing a high priced machine does not always mean it's the best one for you and your end use.
My suggestion... start off with the basics. As your skills develop and grow, you will get a better grasp of what you need from your machine and can reinvest in the purchase of a higher-functioning machine.
Computerized machines are not always best. They are push button friendly, but are quite a pain to fix especially of the electronic board decides to burn out.
My suggestion... the simpler, the better. The dials and switches of a basic machine are much easier to adjust and fix than an electronic board or touch screen panel that may burn out.
Being longtime seamstresses, the team here at SEW Moni has had plenty of chances to thoroughly test some products and have compiled a list of tried and true tools that every seamstress should have in her possession.
Scissors
A good, sharp pair of Fiskars are a must! The brand has been around for ages, since 1694 to be exact. Their products are readily available and have great longevity. Not in the mood to buy another pair, make your well-used scissors like new and have them sharpened for a fraction of the cost. No wonder they are the world's #1 scissor brand.
Available at Joann Fabrics, Target, Walmart, and just about any sewing supply store.
Magnetic Pin Cushion
My mother introduced me to this wonderful invention, and I haven't used my tomato cushion since. Not only helpful for keeping your pins organized and at your finger tips, it's perfect for post project clean-ups. Just a slow sweep across your table, and it picks up any loose pins scattered about.
Grabbit is our brand of choice.
Pick one up at Joann Fabrics. Sil Thread in the NYC garment district is a great source too.
Seam Ripper
I lovingly call this the "sewing eraser" and it's is a must for pulling out those little mistakes that seem to show up as we are sewing. They are quite useful for creating machine stitched button holes too! Seam rippers come in a variety of sizes and shapes. I find that the one's with the longer handles are easier to control.
Available at Joann Fabrics, Sil Thread and Panda Thread of NYC.
Iron
Voted best iron by the SEW Moni team and prized by our current students, the Rowenta Focus Stainless-Steel Iron gets rid of those pesky wrinkles and presses seams flat with beautiful smoothness and ease.
Pick one up at Target or Joann Fabrics.
Measuring Tape
Where would pattern making be without measurements? Keep your sewing accurate with one of these flexible and perfectly portable rulers.
Excitingly, we have started our first set of sewing classes this week, and they are going great! It's always exciting to meet new students who are eager to learn the craft of sewing and take part the enjoyment of it all.
So far within our classes, we've managed to attract college students, architects, designers, administrators, and business owners. I find it interesting that sewing alone can bring such a diverse group of women together. It truly is a beautiful thing. With that said, we would love to have you as part of our sewing classes this month!
Morse code |ˈmôrs|
noun
an alphabet or code in which letters are represented by combinations of long and short signals of light or sound.
verb [ trans. ]
signal (something) using Morse code.
ORIGIN mid 19th cent.: named after Samuel F. B. Morse (1791–1872), U.S. inventor.
I'm dying to tell you what we have cooking in our crock pot of creativity here in Ft. Greene Brooklyn.
However, my team has sworn me to secrecy. At least until January 15th.
I am allowed to give you a hint: It has a lot to do with code and a little bit of romance.
I recently took a trip to Staten Island to pick up fabric at a local Jo-Ann's store. While there I met an individual who sparked up a conversation with me about his design aspirations and quest to find the perfect wool blend. He noted how searching for fabric or even knowing an online site where fabric is critiqued, not just sold, is scarce. This brief discussion got me thinking that there are probably fabric critics out there and maybe we at SEWMoni could help build a list of such critics?
Selecting fabric is definitely personal and if not, a crucial decision regarding any project. Facets of a fabric's texture, down to weather or not it is washable, are important factors will affect your project.
All this to say, if you are a person who critiques fabric, we'd love to hear from you! Please send us your blog or contact information. Our goal is to link to students and craft peeps to one another as well as provide any information that might make sewing easier.
Although 2009 has been a great year for SewMONI, we are looking forward to all that 2010 has in store! In this coming year, which is only a day away, we will be starting a few new endeavors.
Ever had the craving to sew up something great out of that left over fabric, or make some new curtains for your naked windows? Well starting February 1st, the SEW Moni team will begin teaching sewing classes for beginners and intermediate sewers at our studio in Ft. Greene.
From basic sewing and home decor, to beginning clothing construction and pattern making, we have affordable optiond for you to get a started!
Learn to create your own tote, apron, curtians, skirt, or dresses in a fun relaxed environment. All of our classes are project based and the prices include the use of our sewing machines and basic supplies.
Soon we will be launching our new spring line full of bright new fabrics and designs to put a smile on your face. In the mean time, to make room for the new product, we are selling the former season's totes and cosmetic bags at a fabulous price.
Take a look and pick something up for yourself on our Etsy account.
For those of you that have it in you to do-it-yourself, apron and tote patterns will be available for online purchase. Fabric by the yard and fat quarters will also be available to supply any of of your sewing projects.
Once spring hits, get ready for our new product line, so stay tuned for the new and exciting developments at SEWMoni.com!