
Showing posts with label Learn To Sew. Show all posts
Showing posts with label Learn To Sew. Show all posts
2 Videos. 2 Ladies.
Wednesday, October 27, 2010
I am in Corpus Christi Texas this week after taking time to work for Lucky Magazine in Houston this past Saturday. Katie manned NYC while I was away, busy preparing our shop for it's opening in November!
Little by little our DIY efforts are taking shape and we can't stop smiling.

October Sewing Classes!
Monday, September 13, 2010
Fall has arrived and we've opened up registration for October sewing classes!
Part of the exciting fall line-up is our new sewing studio in Manhattan. So get ready city-dwellers, we'll be hosting classes out of our city-space right next to Bryant Park! Check out Beginning Sewing and Beginning Dress Construction available on Monday and Wednesday nights.
Also stay tuned for our quilting and knitting courses coming up in November!

For more information regarding classes or registration click here, or email katie@sewmoni.com.
Happy Monday!
-Katie
To the Sheets!
Wednesday, July 28, 2010

We just finished our July sewing classes and are getting started to move forward with August which means a few things:
1. New Students!
2. New Classes
When I brain storm for new class ideas I often consider the weather. Sounds like a cliche, but it's true. And with fall approaching soon, its definitely time to get to quilting!
In order to quilt its very important to:
1. Research
2. Decide voice of Quilt
3. Consider Colors
4. Define design & Dimension
I intend to go over each steps within the next weeks and to also expand upon where and how to get the quilting resources you need!
In regard to my first step, above is an image I pulled from DesignFreebuies.org for quilt inspiration. I'm also going to go to the MoMA museum today to see what else might influence our fall quilt blocks. Last, I'll more than likely research the idea of "early fall quilts". Was or is this a movement? What is early fall?
Such efforts are my prep or "scout" work, my most favorite part of the quilt design process. Scouting forces me to visit museums, attend events and read books for inspirational purposes---as well as take in dinners with fellow crafters to collaborate!
In regard to my first step, above is an image I pulled from DesignFreebuies.org for quilt inspiration. I'm also going to go to the MoMA museum today to see what else might influence our fall quilt blocks. Last, I'll more than likely research the idea of "early fall quilts". Was or is this a movement? What is early fall?
Such efforts are my prep or "scout" work, my most favorite part of the quilt design process. Scouting forces me to visit museums, attend events and read books for inspirational purposes---as well as take in dinners with fellow crafters to collaborate!
It takes me at least 2 - 3 weeks of scouting for each quilt I make. Why so long? Quilts are built upon the foundation of not only sewing and craftsmanship, but story telling. Having a clear and thoughtful story to accompany the long hours of needle work is always nicer :) Also, creating quilts is completely different than clothing construction. The process is quite geometrical and requires one to be excited about details!!
All that to say, I am ready to quilt and expect such to be involved with our Sept. class and you one blog at a time!
XO
Textile Tuesdays Present: Seersucker
Tuesday, July 13, 2010

With this wonderful heat wave that has swept through New York this past week, my mind couldn't help but wonder to the cooler fabrics of summer. One of my personal favorites is seesucker.
Usually made of 100% cotton, this woven sports a rippled or wrinkled appearance making it great for relaxed summer wear. The fabric ripples are created in the weaving process, called slack-tension weave. The use of tightly woven, heavy-weight warp yarns and loosely woven light-weight weft and warp yarns created the unique texture of seersucker.

The weaving pattern creates a stripped or plaid design in the fabric. The name seersucker originates from the Persian words for milk and sugar (shir or shekar) in reference to the smooth and bumpy texture. The rippled texture actually keeps the fabric from clinging to the skin and allows air flow between the skin and fabric to keep you nice and cool. Also, since it's already wrinkled, there is no need to iron before wearing, just get up and go. Seersucker is featured in children's clothing, suiting, shirts, skirts, pants, and shorts.
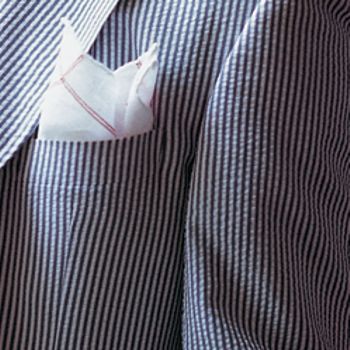
So go with the summer time flow and whip up a couple of dresses or skirts to keep you cool this season!
Happy Sewing!
-Katie
Sewing Tools: Rulers
Monday, July 12, 2010

The Ruler Round-up!
3 rulers - 3 brands - 3 uses
______________________________
Each ruler has a specific use and works quite well in the mediums they've been designed for. So amp up your crafting with one of these nifty rulers and let the creativity begin!
______________________________
Each ruler has a specific use and works quite well in the mediums they've been designed for. So amp up your crafting with one of these nifty rulers and let the creativity begin!
______________________________
Ruler #1
See-Thru Dressmaker's Ruler
by: Dritz

-Taking general measurements and gauging seam allowances
-Measuring and marking placement for buttons, buttonholes
-Measuring and marking spacing for pleats and tucks
-Drawing pattern guidelines-Makes a useful as a guide for rotary cutters
Specifications:
-15 inches long, 4 inches wide
-1/8 inch thick (its heavier weight makes it great for a cutting guide)
-Inches are marked along one side, Centimeters are marked along the other side
-Pre-measured slots run length of ruler to make quick and accurate markings
______________________________
Ruler #2
Acrylic Ruler Coastal Colors
by: Fiskars

-Taking general measurements and gauging seam allowances
-Makes a useful as a guide for rotary cutters
-Marking and cutting quilting pieces
Specifications:
-18 inches long, 3 inches wide
-1/8 inch thick (its heavier weight makes it great for a cutting guide, but not too bulky to move around your cutting table easily)
-Marked with 1 inch grid lines and 1/4 inch lines run the length of the ruler (great for measuring quilting pieces)
**I love to use this one for all my rotary cutting needs**
______________________________
Ruler #3
B-85 C-Thru Ruler

-Pattern Making
-Drawing accurate straight lines
-Adding seam allowance with ease
-Taking accurate measurements
Specifications:
-18 inches long, 3 inches wide
-1/8 inch grid lines
-Light weight design (easy to use, portable)
**My all time favorite**
Happy Sewing!
-Katie
Sewing Tips: Facts about Fabrics
Saturday, July 3, 2010

Below is an excerpt from 150 Sewing Tips by Mary Johnson, printed in Woman's Day in 1962. I found this booklet in my grandmother's sewing library. Reading it not only conjured up memories of my grandmother, but reminded me of the legacy of this crafting tradition.
Facts about Fabrics
* Woolens are the easiest to handle, especially the firmly woven medium weights. They come folded wrong-side out, all ready or the pattern.
* Cottons are the next easiest. They are folded right-side out and when printed, or when the right and wrong sides are different, as in sateen, they must be re-folded wrong-side out, before pinning pattern.
* Tubular jersey and other knits are often manufactured with the right-side out, but sometimes come the other way around, so inspect them carefully before laying out the pattern.
* Some wools have nap, a surface finish on the right side that is smooth to the touch when brushed with the hand one way, rough when brushed the other. Use with nap smooth in a downward direction.
* Some cottons such as corduroy have a pile, smooth to the touch one way, rough the other. The smoothness is usually worn upward for clothing, directed down for household items.
* Synthetics, made in many imitations of natural fabrics, often have a nap or pile too, and they are used in exactly the same way as their natural counterparts are.
* When silk, rayon or synthetic velvet is used for clothing, the pile is usually worn upward for richer color and better wearing quality.
* With upholstery velvets, the pile is placed downward. The tone is subtler and it is easier to clean.
Have more questions about fabric? Stay tuned for Textile Tuesdays where we highlight a different fabric's make and use every week.
-Katie
Machine Embroidery: Spark Stitch
Friday, July 2, 2010

I found some old sewing notes my grandmother made as she was learning machine embroidery on her Singer. The complexity of these stitch patterns are amazing! Since her day, the cost to buy embroidered fabric is much lower and as a result the art of enhancing fabric with machine or hand embroidery has somewhat been lost. So take a sewing lesson from my grandmother, Norma Joy, on the Spark Stitch.
Spark Stitch
Supply List:
-Fine silk or mercerized thread
-Heavy silk or mercerized thread
-Embroidery hoop
-Sewing machine
-Feed plate cover, or machine with feed adjustment
Machine Prep: The bobbin, or lower tension is loose. The upper tension is normal or slightly tight. The feed of the sewing machine is dropped or a feed cover late is used. Remove the presser foot.
Fabric Prep: The design is stamped or drawn on the right side of the fabric. Place material in hoops. If following a a pattern is preferred select one recommended for braiding

Beginning Stitch: Insert hoops under needle and presser bar. Lower presser bar. Hold end of top thread, lower needle, and draw bobbin thread through to top
Spark Stitch: The work is guided about in an even circular motion while following the design. This is usually freehand work and is done on the right side of the garment.

I feel quite inspired to try this myself on some dish towels, or maybe some old denim cut-offs. It could be quite cute right?
Sew on people!
Katie
Sewing Tips: Your Sewing Machine
Thursday, July 1, 2010

Below is an excerpt from 150 Sewing Tips by Mary Johnson, printed in Woman's Day in 1962. I found this booklet in my grandmother's sewing library. Reading it not only conjured up memories of my grandmother, but reminded me of the legacy of this crafting tradition.
You Sewing Machine
* If the thread breaks when you stitch, the machine is improperly threaded, you've inserted the needle improperly or you are using the wrong make needle.
* If the machine has been unused for some time, oil it in the tiny holes provided for that purpose. Stitch through cotton strips to absorb excess oil.
* Regulate length of machine stitching to suite fabric texture. For heavy coatings, 12 to 13 stitches to the inch; for medium-weight suiting, cotton or synthetics, 14 or 15; for sheers, 16 or 18.
* Use a medium-size machine needle for general garment making.
* If the stitches don't look right, check threading and bobbin. If the trouble still exists, consult the instruction book.
* You can improvise a seam guide with a strip of adhesive tape about 2" long. Place it straight up and down on the machine plate as far right of needle hole as width of seam allowance (usually 5/8"). When you stitch, bring raw edges of fabric up against tape edge.
* If your machine puckers some fabrics take the needle out of the shaft and roll is on fine sandpaper; or sew through the sandpaper without thread (abrasive side up to sand won't get into the works).
* If machine skips stitches on synthetics, especially tricots, change to a fine machine needle and nylon thread.
Let the good times roll and happy sewing!
-Katie
SEW Moni April Sewing Classes!
Wednesday, March 17, 2010

We have many great classes for Spring starting this April. Please check out our list of classes. Just click on flyer above to view in larger scale.
Thanks!
SEW Moni Team
March Sewing Classes
Friday, February 5, 2010

Excitingly, we have started our first set of sewing classes this week, and they are going great! It's always exciting to meet new students who are eager to learn the craft of sewing and take part the enjoyment of it all.
So far within our classes, we've managed to attract college students, architects, designers, administrators, and business owners. I find it interesting that sewing alone can bring such a diverse group of women together. It truly is a beautiful thing. With that said, we would love to have you as part of our sewing classes this month!
We will be offering Beginning Sewing on Monday and Wednesday nights. Beginning Clothing Construction will also be taught on Wednesday nights.
We only have a few spaces left, so sign up while you can!
Sew on, sew on...
Katie
Key to my Heart.
Wednesday, January 6, 2010

noun
an alphabet or code in which letters are represented by combinations of long and short signals of light or sound.
verb [ trans. ]
signal (something) using Morse code.
ORIGIN mid 19th cent.: named after Samuel F. B. Morse (1791–1872), U.S. inventor.
I'm dying to tell you what we have cooking in our crock pot of creativity here in Ft. Greene Brooklyn.
However, my team has sworn me to secrecy. At least until January 15th.
I am allowed to give you a hint: It has a lot to do with code and a little bit of romance.
FYI: Chocolate Fabric is not the answer.
XO. MB.
I'm Happy to be an American
Saturday, September 19, 2009


I was recently mugged and assaulted in Brooklyn, NY. I know. I felt violated, scared and the experience left me jaded for a few weeks. Also, it happened at 2:30pm in the afternoon, in broad daylight! Is that even allowed? Luckily, a few people witnessed, heard my screams and actually came to my rescue. They helped me, picked me up off the ground and took care of me till the police showed up.
Even though our economy stinks and I happened to be a victim of the increased crime rate due to the economic slump, I'm still happy to be living in the US. I'm so blessed that strangers were there for me and their efforts proved to me that city people are kind.
Coincidentally, much of my sewing inspiration is derived from America. The two horse prints above are Robert Kaufman fabrics and I LOVE them. Horses remind me of Texas and all things patriotic. And, the print with flags perfectly moving in sync while horses gallop in glory gives me a sense of comfort.
On a similar note, this week marks a huge gallop for sewMONI. We are bringing on 2-3 part time employees! It's important to me that our small company supports employment efforts in the USA. All of our goods are handmade in the USA one stitch at a time with much care. Our newest employees are quite talented and I am anxious to see what new things will be generated within the next few months.
Enjoy your weekend!
XO
Photo Credit: Robert Kaufman
Subscribe to:
Posts (Atom)
