Be the first to sign-up for sewing classes this January and February! We are offering our most popular courses: Beginning Sewing and Beginning Dress Construction with locations in Brooklyn and Manhattan.
Take part in learning the art of sewing and developing your creativity. Check out one of our students and what her experience was like learning to sew: "November's Sewing Talk with Erin Hefner"
Just wanted to let you in on some exciting things that will be taking place this month.
Moni and I will be back at the Astoria Market next Sunday (November 21st) at Bohemian Hall. We enjoyed getting to know the Queens neighborhood and loved showcasing our new line of sewing patterns. This coming Sunday, we will have plenty of items to stock up for your next craft project including fat quarters, patterns, vintage buttons and trims. We will also have some great gift items too! Come pick out a handmade apron, tote, cosmetic bag, lovely skirts, reworked vintage jewelry, or a hand-poured soy candle. Enjoy next Sunday with us and other crafty vendors at Bohemian Hall 12pm-5pm; it's off of the NQ Astoria Boulevard stop.
In other news, we are proud to announce that the SEW Moni store front will be up and running come December! Get ready to sew and craft as we will be offering more classes, great sewing notions and tools, as well as handpicked fabrics. Stay tuned for more updates for the next few weeks!
Fall has arrived and we've opened up registration for October sewing classes!
Part of the exciting fall line-up is our new sewing studio in Manhattan. So get ready city-dwellers, we'll be hosting classes out of our city-space right next to Bryant Park! Check out Beginning Sewing and Beginning Dress Construction available on Monday and Wednesday nights.
Also stay tuned for our quilting and knitting courses coming up in November!
For more information regarding classes or registration click here, or email katie@sewmoni.com.
Apron Panel Width
1) Measure the width of your hips. If you're wearing pants or a skirt you can use the side seams of the garment as a guide
2) Add 5 inches to this measurement to account for tucks and seam allowance. This measurement will become the width of the apron panel.
3) Divide this number in half to use for drafting the apron panel. We will call this half-width.
Apron Panel Length
1) Decide on the length of the apron panel. Measure from the waist down to the desired length.
2) Add 1 inch to account for seam allowance.
Apron Tie
1) Measure around your waist.
2) Add 32 inches to this length to account for a bow
Cutting the Apron Panels and Apron Tie
Drafting the Apron Panel Pattern onto the Lining Fabric:
1) Fold fabric in half a little more than the half-width of the apron panel.
2) Using the tape measure and pin, measure down the fold of the fabric to the apron panel length and make a small mark.
3) At this mark, measure across the width of the fabric, making a mark at the half-width.
4) Connect the two points together with a straight line.
5) From the end of this line draw a perpendicular line measuring the apron panel length.
6) The measurements and lines will form a rectangular shape.
7) To make the curved edge, use a cup or plate as a guide to draw the curve.
Cutting the Apron Panel from the Lining Fabric:
1) Cut out apron Panel along the guide lines that you have drawn.
Cutting the Apron Panel from Face Fabric
1) Fold face fabric to appropriate width.
2) Pin previously cut lining fabric on top, lining up the folded edges.
3) Cut out.
Cutting the Apron Tie
1) Cut apron tie 5 inches wide, using the calculated length.
**If your fabric is not long enough to accommodate the tie length, simply cut enough piece to add up to the calculated length. Sew these pieces together to create one tie.**
After the previous steps, you should have cut 1 apron panel from the face fabric, 1 apron panel from the lining fabric, and 1 apron tie.
Sewing the Apron Panel
Joining Apron Panels:
1) Place apron panels on top of each other, right sides together.
2) Pin in place.
3) Starting in the right hand corner, sew down and around the curved edges. End in the left hand corner, leaving the top straight edge of the piece un-sewn.
Notching Apron Panel:
1) Notch apron panel curves by cutting triangles into the seam allowance. This will make it easier when turning the piece right side out.
**Be careful not to cut into the sewn seam**
Turning Apron Panel:
1) Turn apron right side out.
2) Push the corners out so that they lay flat and smooth.
3) Iron entire panel flat.
Top Stitch Apron Panel:
1) Top stitch around all edges of the apron panel 1/8 inch from the edge.
** Top stitch the opening as well in preparation for the tucks**
Adding Tucks to the Apron Panel
Measuring Tuck Placement:
1) Measure 3 inches in frorm the side and place a pin.
2) From that mark measure 1 1/2 inches in and place a pin.
3) Continue this process until you have 3 to 4 pins in place. These pins will determine the placement of the tucks.
4) Repeat these steps on the other side of the apron.
Forming the Tucks:
1) Taking one at a time, fold the apron panel in half (face fabric together) where the pin in placed.
2) Pin this fold together
3) Sew next to this fold 1/4 inch from the fold. Sew 1 1/2 inches down and backstitch.
4) Repeat these steps until all pin markers have been formed into tucks.
Ironing the Tucks:
1) Iron all tucks in one direction so that the folded edges of the tucks face inward.
Sewing the Apron Tie
Ironing the Apron Tie:
1) Iron the raw edges of the apron tie in 1/2 inch.
2) Iron the ends of the apron tie in 1/2 inch.
3) Fold apron tie in half, matching up the folded edges and iron flat.
Attaching Apron Tie to Apron Panel:
1) Lay out the apron tie and open it so that the pressed in seam allowance in exsposed.
2) Line up the raw edge of the apron panel with the raw edge of the apron tie seam allowance.
3) Fold the apron tie back over so that the fold lines meet up.
4) Pin in place.
Top Stitch Apron Tie:
1) Now that everything is pinned together, top stitch the entire apron tie.
2) Start on the apron tie side where the folded edges meet. Sew 1/8 inch from the edge.
Finishing Touches:
1) Iron one last time and then bake some cookies!!!
With this wonderful heat wave that has swept through New York this past week, my mind couldn't help but wonder to the cooler fabrics of summer. One of my personal favorites is seesucker.
Usually made of 100% cotton, this woven sports a rippled or wrinkled appearance making it great for relaxed summer wear. The fabric ripples are created in the weaving process, called slack-tension weave. The use of tightly woven, heavy-weight warp yarns and loosely woven light-weight weft and warp yarns created the unique texture of seersucker.
The weaving pattern creates a stripped or plaid design in the fabric. The name seersucker originates from the Persian words for milk and sugar (shir or shekar) in reference to the smooth and bumpy texture. The rippled texture actually keeps the fabric from clinging to the skin and allows air flow between the skin and fabric to keep you nice and cool. Also, since it's already wrinkled, there is no need to iron before wearing, just get up and go. Seersucker is featured in children's clothing, suiting, shirts, skirts, pants, and shorts.
So go with the summer time flow and whip up a couple of dresses or skirts to keep you cool this season!
Below is an excerpt from 150 Sewing Tips by Mary Johnson, printed in Woman's Day in 1962. I found this booklet in my grandmother's sewing library. Reading it not only conjured up memories of my grandmother, but reminded me of the legacy of this crafting tradition.
Facts about Fabrics
* Woolens are the easiest to handle, especially the firmly woven medium weights. They come folded wrong-side out, all ready or the pattern.
* Cottons are the next easiest. They are folded right-side out and when printed, or when the right and wrong sides are different, as in sateen, they must be re-folded wrong-side out, before pinning pattern.
* Tubular jersey and other knits are often manufactured with the right-side out, but sometimes come the other way around, so inspect them carefully before laying out the pattern.
* Some wools have nap, a surface finish on the right side that is smooth to the touch when brushed with the hand one way, rough when brushed the other. Use with nap smooth in a downward direction.
* Some cottons such as corduroy have a pile, smooth to the touch one way, rough the other. The smoothness is usually worn upward for clothing, directed down for household items.
* Synthetics, made in many imitations of natural fabrics, often have a nap or pile too, and they are used in exactly the same way as their natural counterparts are.
* When silk, rayon or synthetic velvet is used for clothing, the pile is usually worn upward for richer color and better wearing quality.
* With upholstery velvets, the pile is placed downward. The tone is subtler and it is easier to clean.
* Some fabrics must be held taut during stitching, with one hand ahead of the needle, the other behind it. This applies to heavy coatings on which the presser foot tends to move the top layer and cause uneven ends at the bottom of the seam; to plaids so that the lines stay matched; to synthetics and to sheers like organza, no matter what their fiber content, to prevent puckering.
Have more questions about fabric? Stay tuned for Textile Tuesdays where we highlight a different fabric's make and use every week.
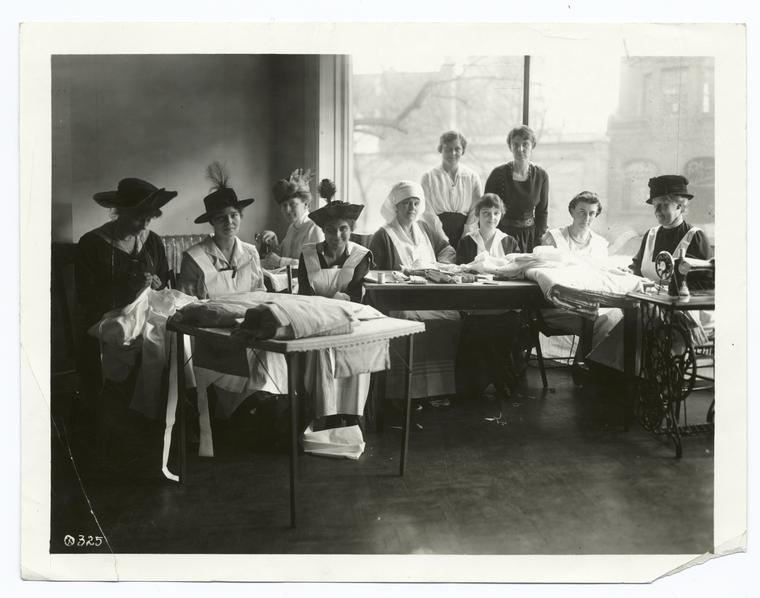
Researching the origins of sewing circles in the USA, I found the beginnings alongside the birth of our country. Many started in churches, as those acted as the tight knit community centers of the day. One sewing circle at Ocean View Presbyterian Church in Delaware was formed in 1879 and served as a place of fellowship and education as well as a basis to fund mission work using handmade goods. This particular sewing circle still stands as the oldest operating society in Delaware.
Many sewing circles served similar purposes and even branched into politics. In an excerpt from Frederick Douglas and the Atlantic World, Douglas wrote a letter to the Lynn Anti-Slavery Sewing Circle in 1846 which shows an even greater social aspect a sewing circle can have.
During the 1950s and 1960s sewing circles took a turn toward the younger generation. Girls would gather in each others homes to hand-sew doll clothing and discuss fund-raising projects for church or school. Many served as a social club since completing projects took a back seat to gossip and eating snacks.
Today sewing circles are still found in churches branching now into community centers, home groups, and businesses that capitalize on sewing. I believe being part of a community is a beautiful thing and being able to share such a personal craft with one another in a group creates a place of endless possibilities. The sewing circle is not only a place to share useful information and inspiration about the craft but serves as a place to sharpen one's person and world views.
Why not start your own sewing circle. Start with a pattern, a social project, or even a simple minding party. Ask friends over once of twice a month to share in the fun and let it naturally evolve from there. Beginning and ending one project after another will establish a beautiful tradition in no time.