
Paris
Saturday, June 30, 2012
A day in Paris is only complete with an afternoon cappuccino. Bisos. Moni
Lady in the Limelight
Thursday, June 28, 2012

We are so excited for Moni! She was featured in PMC Magazine's Who Am I? article. Take a look at the full article online at PMC. Congratulations Moni, you rock!
xo - SEW Moni Team
A Quilting Story
Sunday, June 24, 2012
Vallen from our Beginning Sewing class decided to take her newly learned sewing skills to the next level and signed up for our Quilting 101 workshop. This is her quilting story (got to love a good photo story)...
MEET VALLEN - She's just swell!

THE FIRST STEPS - She chose the fabric color scheme and cut all the pieces to make the quilt blocks.

THE NEXT STEPS - It's stitching time! She created the blocks by sewing them row by row.


BUILDING THE BLOCKS - See how the quilt block was built row by row and attached all together to form the mini quilt.

 Find more sewing stories like these on our Instagram feed @sewmonibrooklyn and in our Student Designs blog section.

FINISHING THE QUILT -Vallen first layered the batting and the backing fabric to her quilt blocks. Then she stitched the layers together and added the binding around the outer edge of the quilt.
 Find more sewing stories like these on our Instagram feed @sewmonibrooklyn and in our Student Designs blog section.
Sew on people!
xo - Katie
DIY Leather Cuff
Saturday, June 23, 2012
 |
| Image via Think Crafts! |
We've really latched onto this DIY jewelry project from Think Crafts!. Take a trip to your local hardware store and let the creativity begin!
 |
| Image via Think Crafts! |
Leather
Clasp
Rivets & Setter (get the assorted kit)
Punch or an XACTO Knife
Scissors or Utility Knife
Hammer or Mallet (to set the rivets)
Leather Cement (optional)
Water-Based Varnish (optional)
Step 1: Cut the leather strip
To determine the length, measure around your wrist and add 2 inches. Use the size of your clasp to help determine the width (the one pictured is 2 inches wide). Using your scissors or utility know cut the leather piece to size.
Step 2: Preparing the leather strip
Fold each end of the strip under by at least 1 inch. Secure the folds with the leather cement (optional).
Step 3: Marking the clasp placement
Wrap the leather around your wrist to size and place the closed clasp where the edges meet. Use a pen to mark where the rivets will go to secure the clasp. Using a leather punch or an XACTO knife, create holes where the rivets will be placed.
Step 4: Inserting the rivets
Choose the rivet size carefully to ensure a secure fit. Make sure the rivet will pass through 2 layers of leather and the clasp extending no further than 1/8 inch (the one pictured uses the smallest rivet size). Insert the rivet post from the backside and snap the cap on top. Use a mallet and rivet setting tool to secure the rivet by giving it a sharp strike.
Step 5: Finishing the leather cuff
For a cleaner look use a water-based varnish to smooth and seal the edges of the wrap.
Happy Crafting!
xo-Katie
LA Chronicles
Wednesday, June 20, 2012
For the past 5 days LA has been terribly sweet to me. No grey skies. Just bold blue horizons, perfect sun and beautiful people too.
I'm so enthralled by Cali-love that I didn't even mind sitting in 2 hour traffic today while headed back to Venice from downtown LA.
From lush fabrics to puppy poodles and vintage Chevy step-side trucks, LA has it all. Or at least has my eye.
Now, if only there was a SEW Moni shop in Venice off Abbott Kinney. To be continued...
Xo-Moni
Color
Monday, June 18, 2012
There's something about color that makes me smile. Its inviting, unexpected and confident.
While traveling through Del Mar and San Diego this week I've seen so many incredible colors incorporated into architecture, textiles and plant life. New York doesn't applaud color like south western cities and it's nice being around such liberating expressions of color. It makes me want to dance or quilt or sew a pair of floral summer shorts.
All this to say, don't shy away from the chance of adding a bit of color to your life. It'll definitely force you to look beyond the boundaries of black and white.
Xo Moni
Banner O' Triangles
Saturday, June 16, 2012

Our office space needed a little pick-me-up, so I broke out the scrap fabric and the scissors and sewed up a sweet DIY banner to add some texture and color.
Here's how...

Materials:
Fabric, Scissors, Pinking Shears, Ruler, Pins, Thread, Sewing Machine
Step 1: Chose your fabrics
Combine different fabric prints that share warm and cool color tones. This means pairing up the green, blue, and aqua fabrics or matching up the red, yellow, pink, and orange fabrics. The similar color palette will help unify the different fabric prints in the banner.
Step 2: Cut the banner streamer
Using the pinking shears, cut a banner streamer 3 inches wide and at the desired length.
Step 3: Cut out the triangles
Cut the triangles so that all 3 sides were all 10 inches long. If you plan on hanging this in a doorway or in a window, you may want to consider cutting 2 triangles of each fabric so that the fabric print can be seen from both front and back views.
Step 4: Pin the banner streamer and triangles together
Iron the banner streamer in half along its length. Evenly space the triangles along the banner streamer and pin in place between the fold of the streamer.
Step 5: Sew the banner streamer and triangles together
Stitch the banner streamer and triangles together 1/4" away from the cut edge of the banner streamer.
Step 6: Cut slits into triangles
Add a bit of movement to the banner by cutting 1" slits into the triangles.
We would love to see your version of the "Banner O' Triangles" - comment and share your image link!
Happy Sewing!
xo Katie
Cali Birthday
Friday, June 15, 2012
I'm in Venice, CA for my birthday this week. One thing I love about Southern California is its organic vibe.
From succulent plants to freshly squeezed juices, there's something intrinsically natural around every corner, including a birthday fist :-)
xo- Moni


From succulent plants to freshly squeezed juices, there's something intrinsically natural around every corner, including a birthday fist :-)
xo- Moni
House of Cards
Tuesday, June 12, 2012
My old roommate Mark stopped by the shop a few weeks ago and built a house of cards with me. Through the process we both learned that it's not that easy to build a "statement". Also, our patience was tested more times than not, but after a solid hour of heart, our masterpiece was complete.
What are you crafting this week? Let us know if you need a cheerleader! XX- Sew Moni Team


What are you crafting this week? Let us know if you need a cheerleader! XX- Sew Moni Team


Lace
Sunday, June 10, 2012
We were so thrilled when a Brooklyn neighbor dropped off a box of lace and said "Take it".
How often does that happen?
Not often enough. Xx- Moni

How often does that happen?
Not often enough. Xx- Moni

Vote SEW Moni!
Wednesday, June 6, 2012
 We are excited to announce that we have applied for a $250,000 Small Business Grant by Living Social & Chase!
To qualify for this grant, we need at least 250 votes. This is where you come in. . . we need YOUR VOTE.
Please take the time to log-in and cast your vote for SEW Moni.
It's as easy as 1-2-3-4!
1. Visit www.missionsmallbusiness.com
2. Log-in using your Facebook account info
3. Search for "SEW Moni" under business name
4. Click the VOTE button
Thank you for your continued support. We couldn't have made it this far without YOU!
XO
Moni + Katie


Can't live without...
Friday, June 1, 2012
1. Excited sewing students who dance with whimsy upon finishing their first sewing project.
2. West Cafe
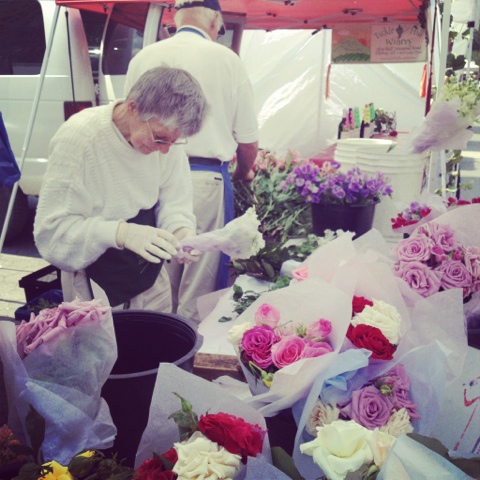
3. LocalRoses.com
4. New York Street Art
5. White


2. West Cafe
3. LocalRoses.com
4. New York Street Art
5. White
Subscribe to:
Comments (Atom)
